Obsidian and Readwise Integration Tutorial: Clippings, Highlights, and Property Fields
Obsidian Readwise sync tutorial: plugin install, Readwise export settings, file naming, body formatting and YAML properties to sync highlights reliably.
Plugin installation
If you have not installed community plugins before, read this first: Obsidian plugin installation tutorial for all platforms. If you already know the installation flow, you can start here.
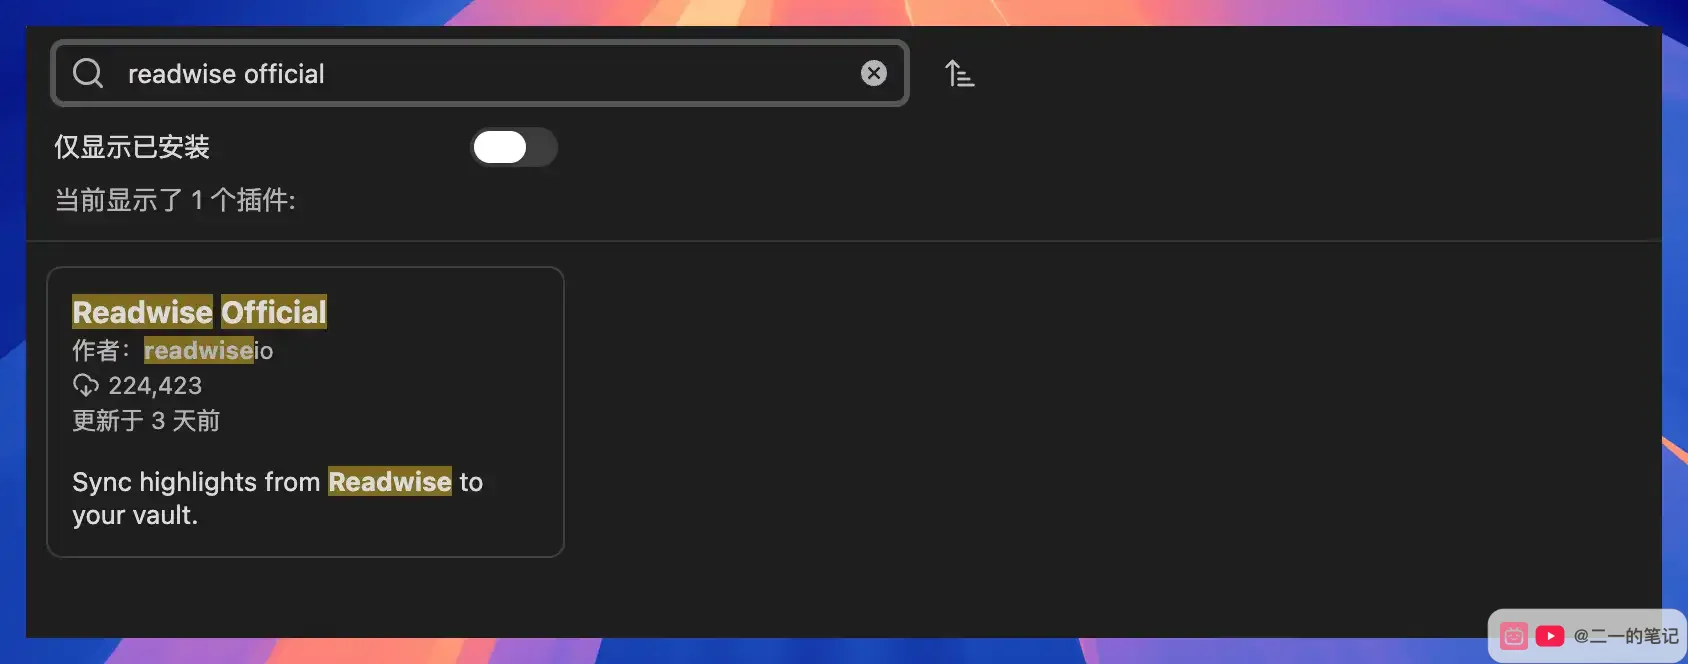
Search for Readwise Official in Obsidian community plugins.
After installing and enabling the plugin, open its settings page and click Connect.
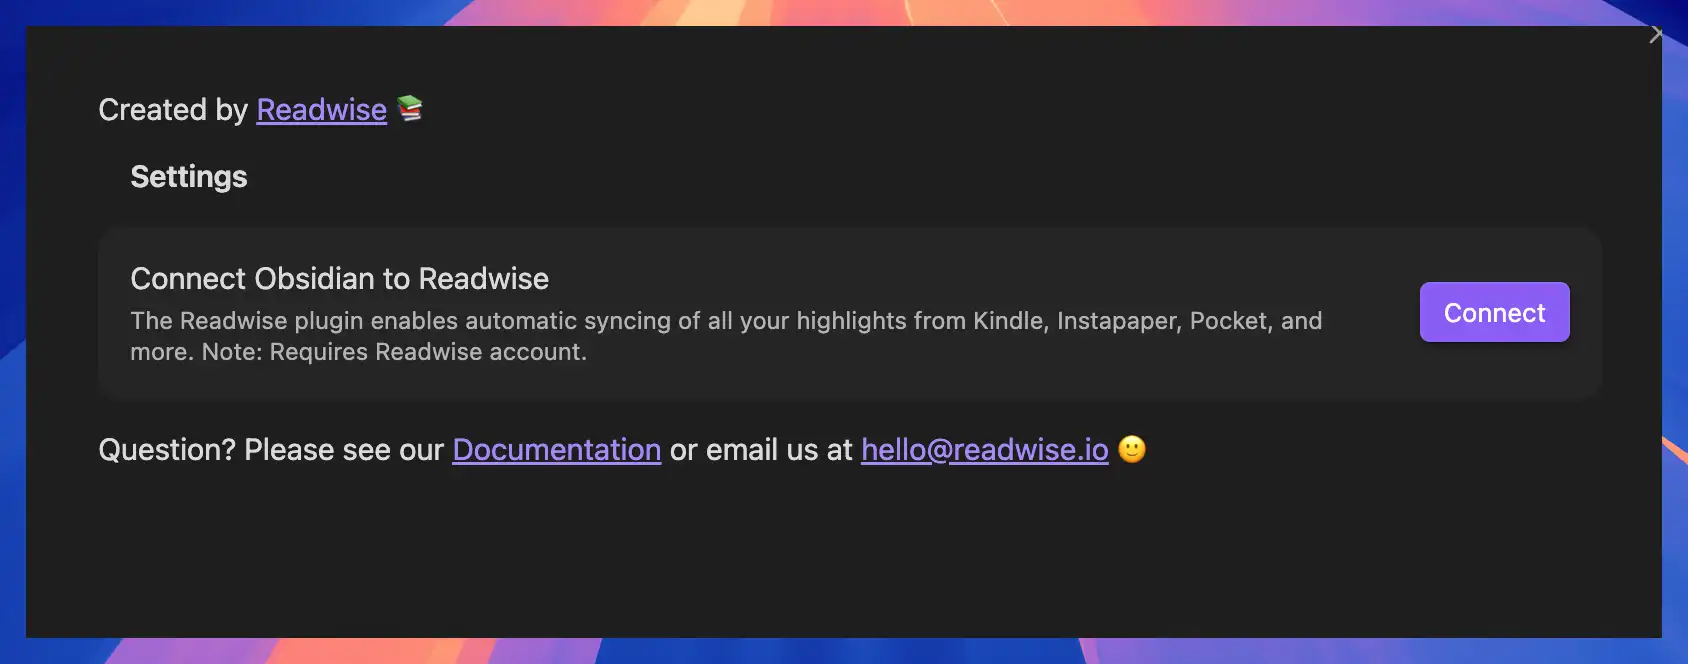
This step opens the browser and lets Obsidian connect to your Readwise account.
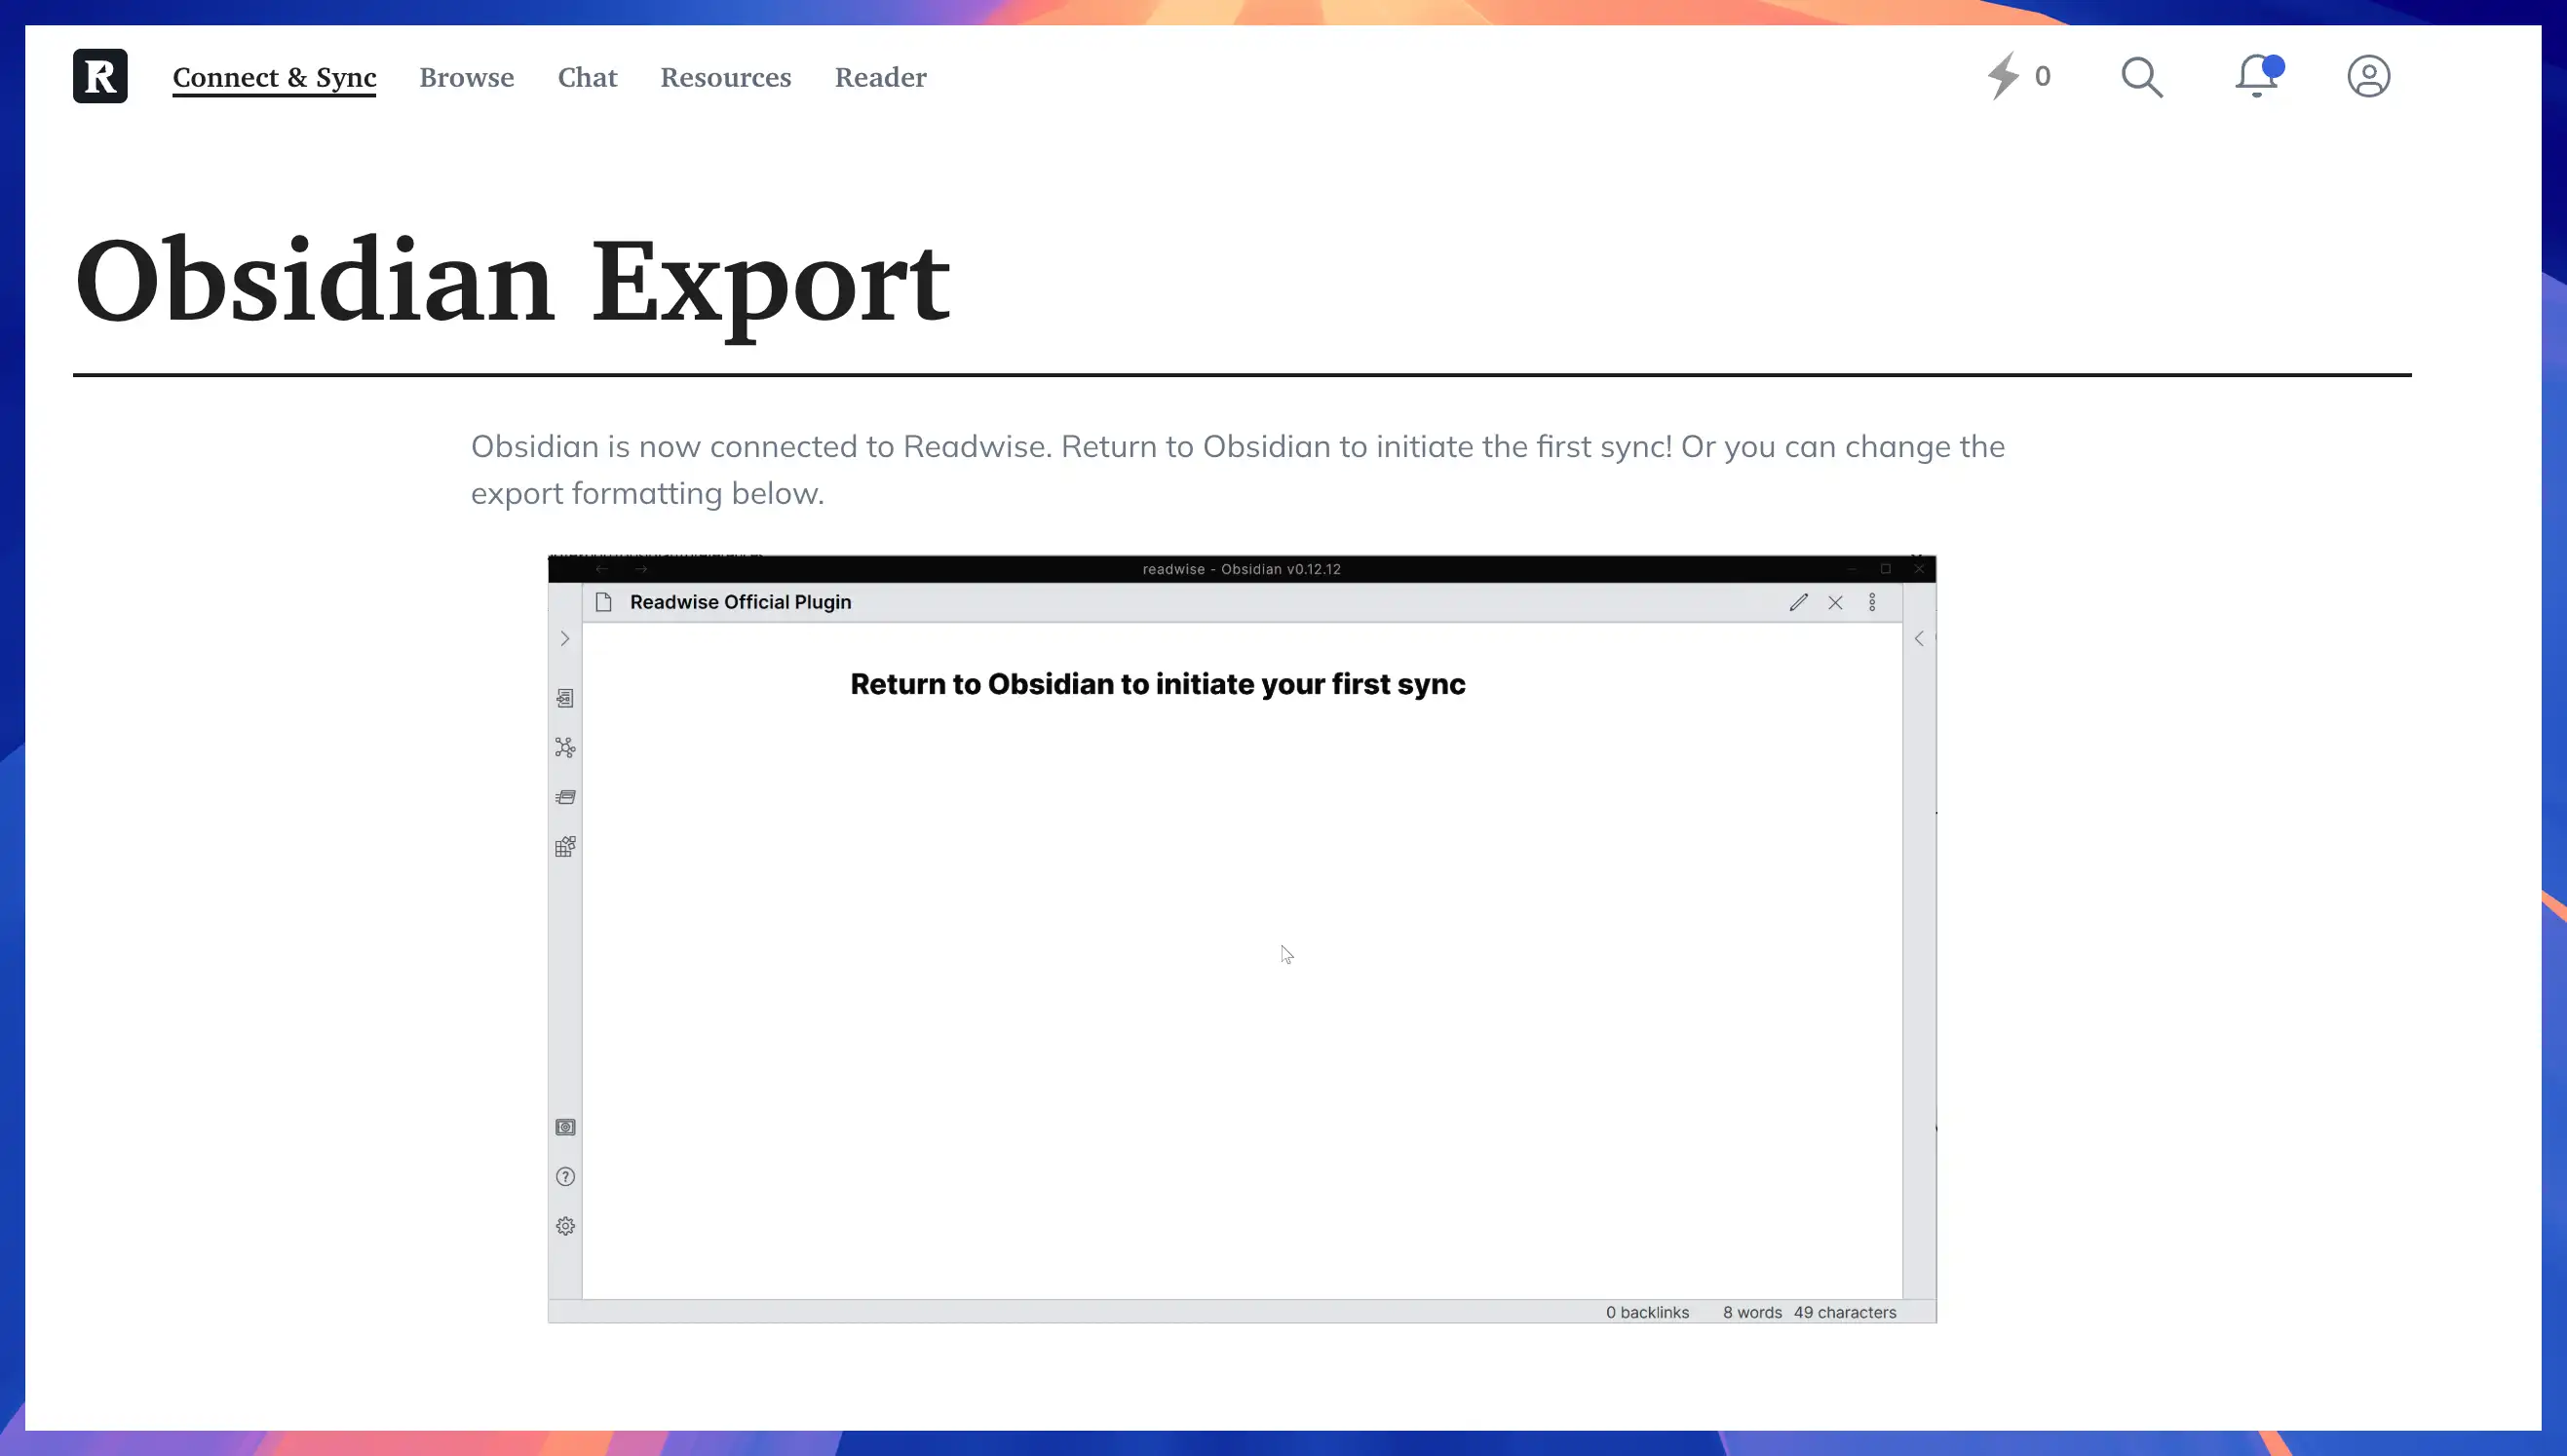
When you see Obsidian is now connected to Readwise, the authorization is complete.
Web export settings
The options in the next screenshot may feel a little overwhelming at first. If you cannot parse them quickly, you can paste the article into an AI tool and ask it to help configure them. That may be easier and more accurate than reading every option by yourself.
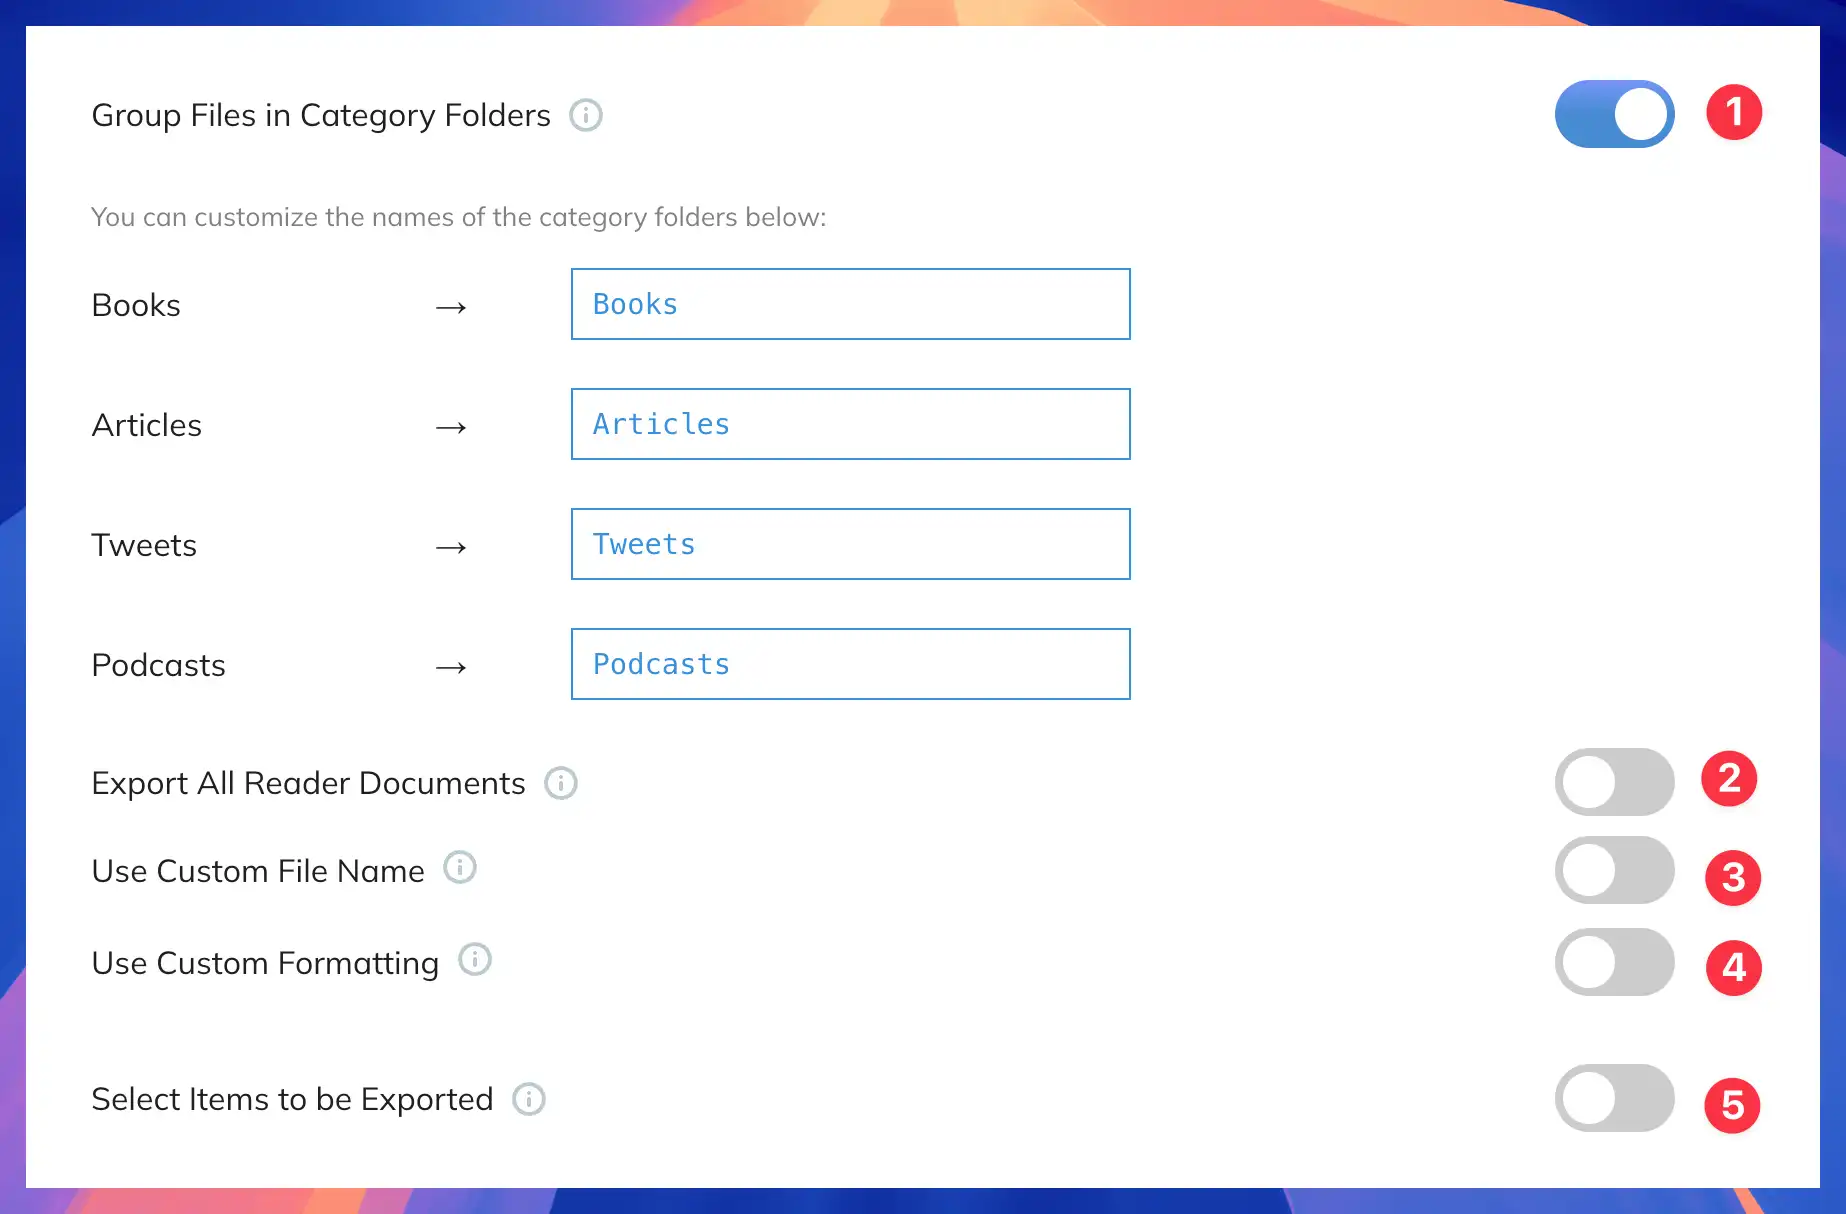
The settings work like this.
1. Group Files in Category Folders
When this switch is turned on, Readwise stores content from different sources in separate Obsidian folders. The default setup is:
- Books go into
Books - Articles go into
Articles - Tweets go into
Tweets - Podcasts go into
Podcasts
You can rename these folder fields. For example, if you do not want English folder names, you can change Books to another name and Articles to another name.
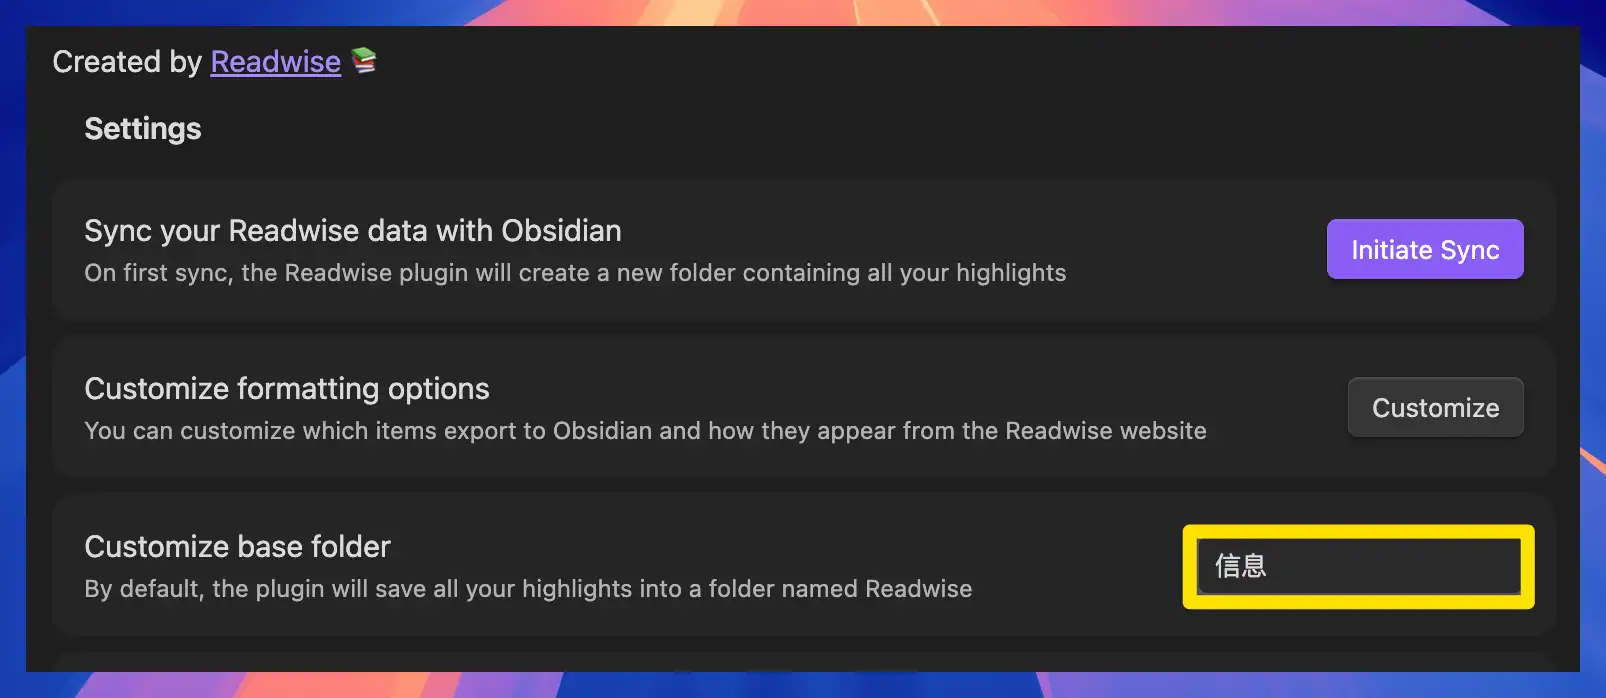
If you turn this switch off, Readwise no longer creates category folders. It syncs all content into the main folder you set in the Obsidian Readwise plugin, as shown below.
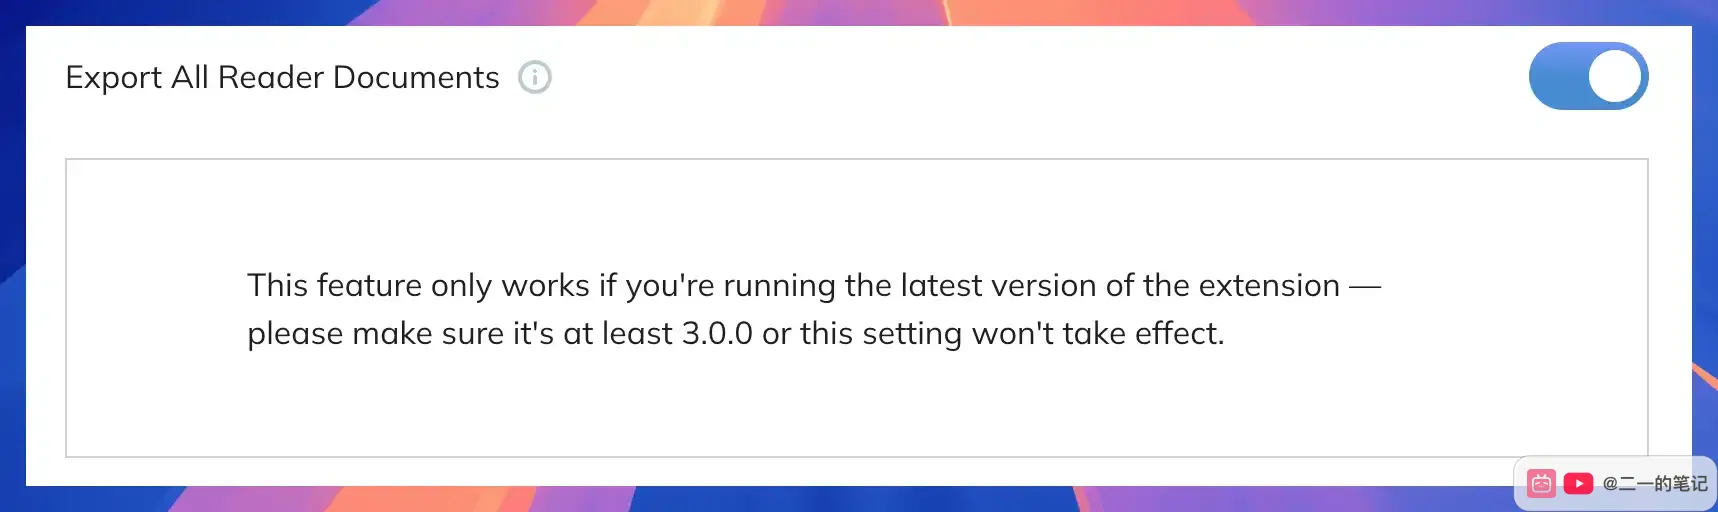
2. Export All Reader Documents
If you only want to sync highlights and notes into Obsidian, keep this turned off. When it is turned on, Readwise also exports the full documents from Reader, so it syncs the full text in addition to the highlights you marked.
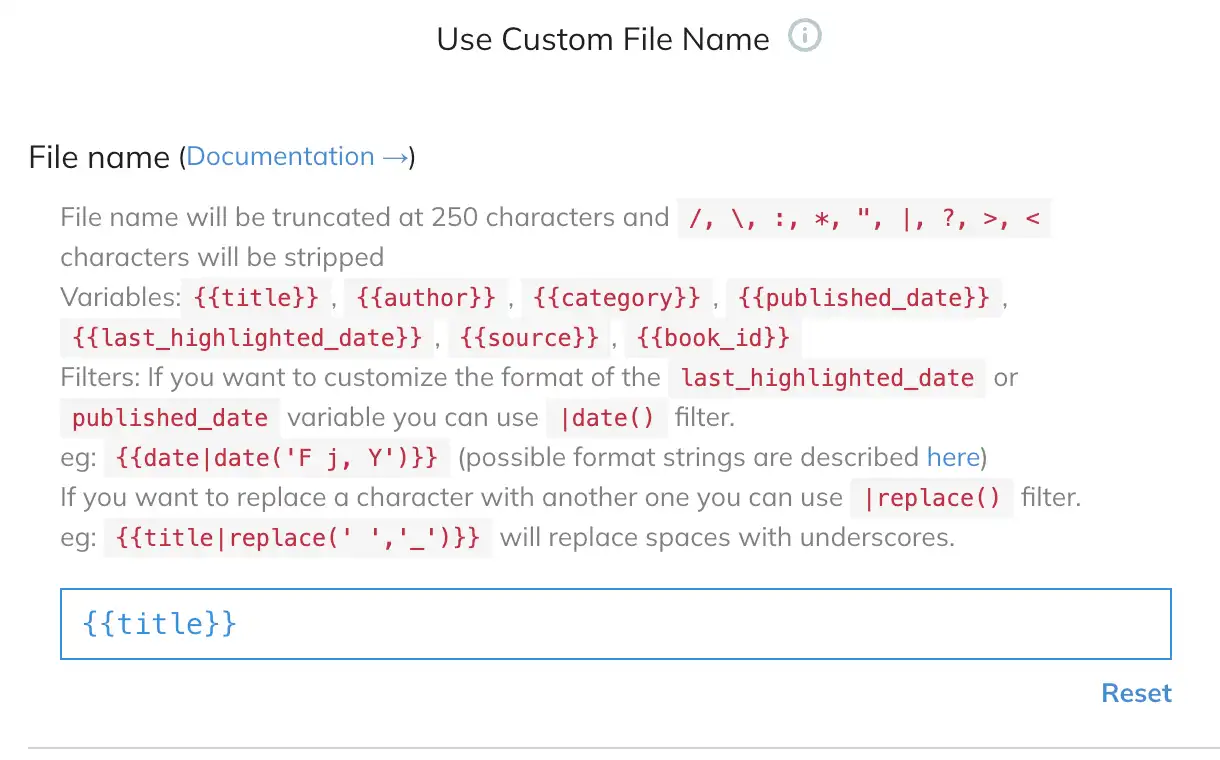
3. Use Custom File Name
When this is turned off, Readwise uses the default file name. When it is turned on, you can decide how each note should be named, such as using only the title, or adding the author, source, or date before the title.
File name controls the file name for regular highlight notes. Here it is set to {{title}}, which means the original title is used directly as the file name.
Full Document Text file name controls the file name for full-text files. This setting only takes effect when Export All Reader Documents is turned on.
By default, it also uses {{title}}, which means the full-text file uses the title as its file name too.
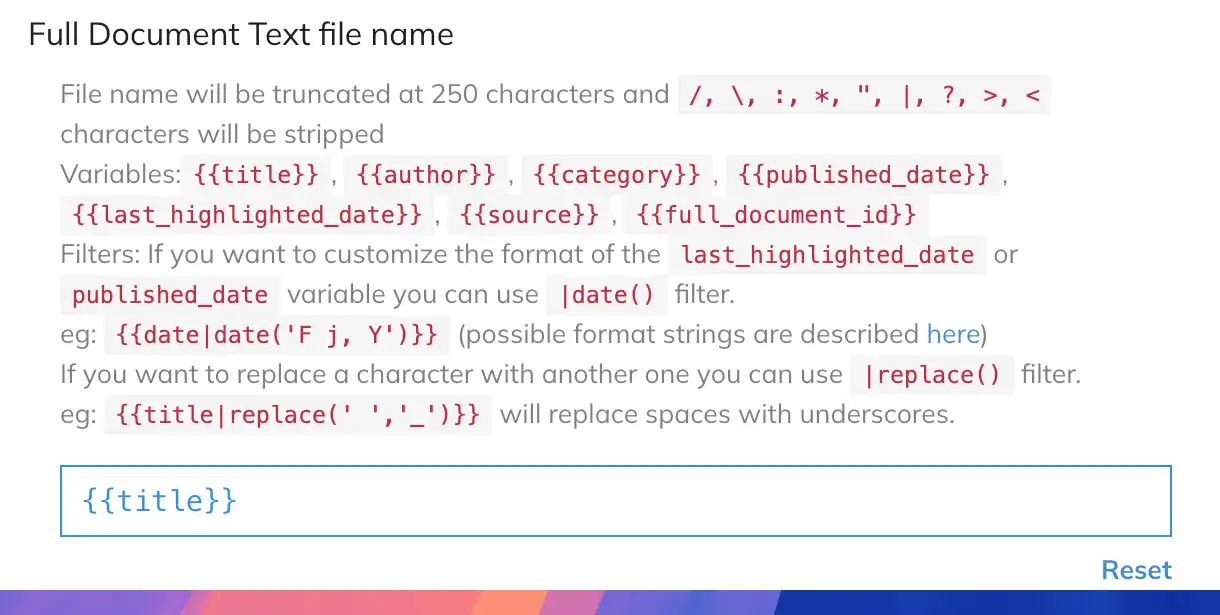
You can think of {{title}}, {{author}}, and {{category}} as placeholders. During sync, Readwise replaces them with the actual title, author, type, publish date, source, and other information.
4. Use Custom Formatting
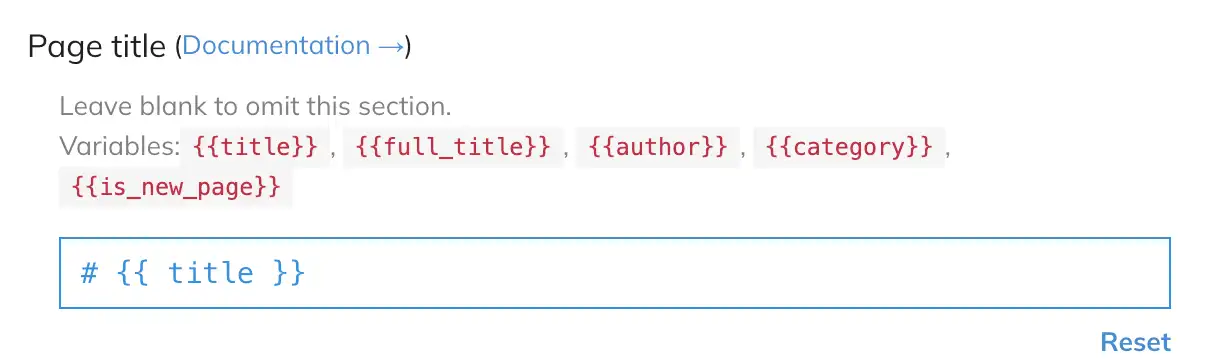
Page title controls whether an extra title is generated at the beginning of the note body. The default # {{ title }} writes the original title as an H1 heading, so if you do not want another H1 in the body, you can clear this field.
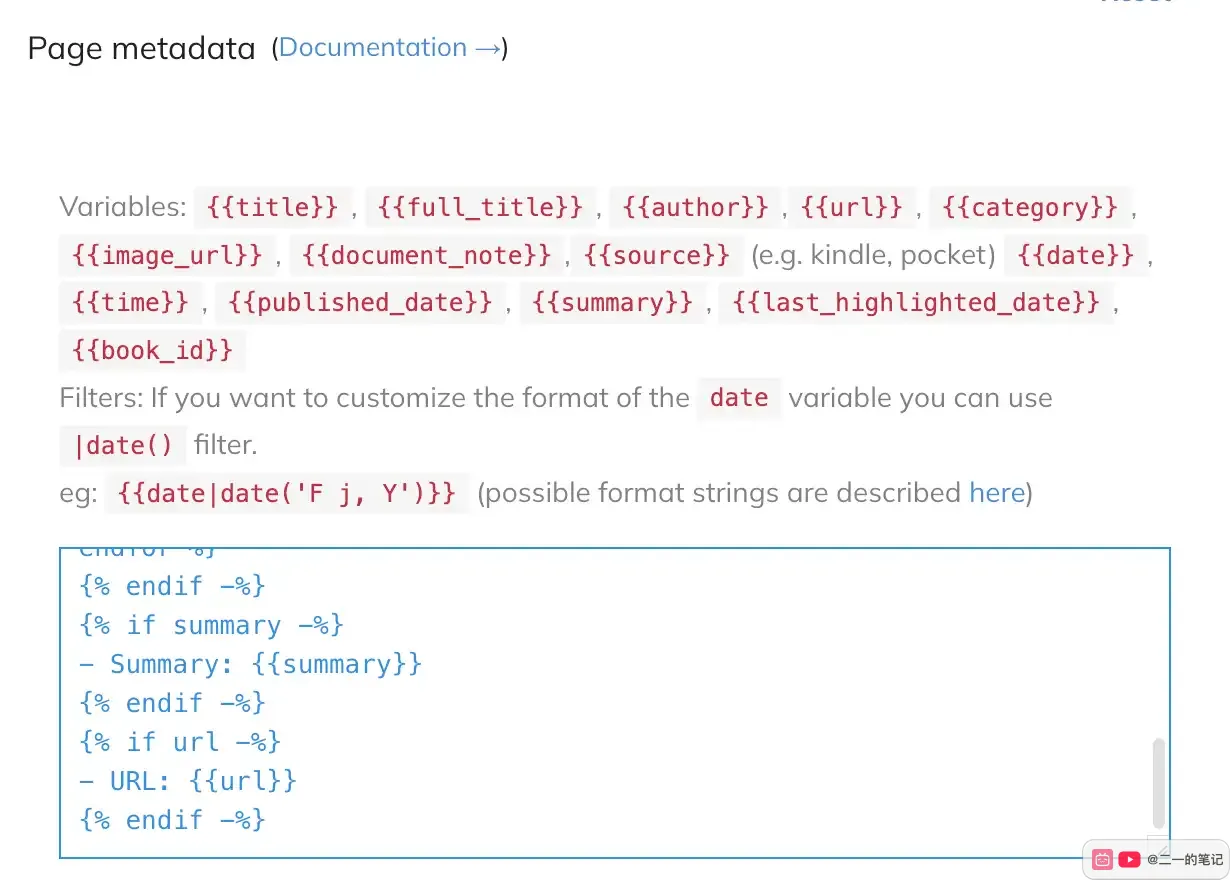
Page metadata controls the metadata block in the body, such as author, full title, category, tags, summary, and source link.
If you plan to write this information into YAML front matter, you can leave this field empty to avoid repeating the same information in both the body and the properties.
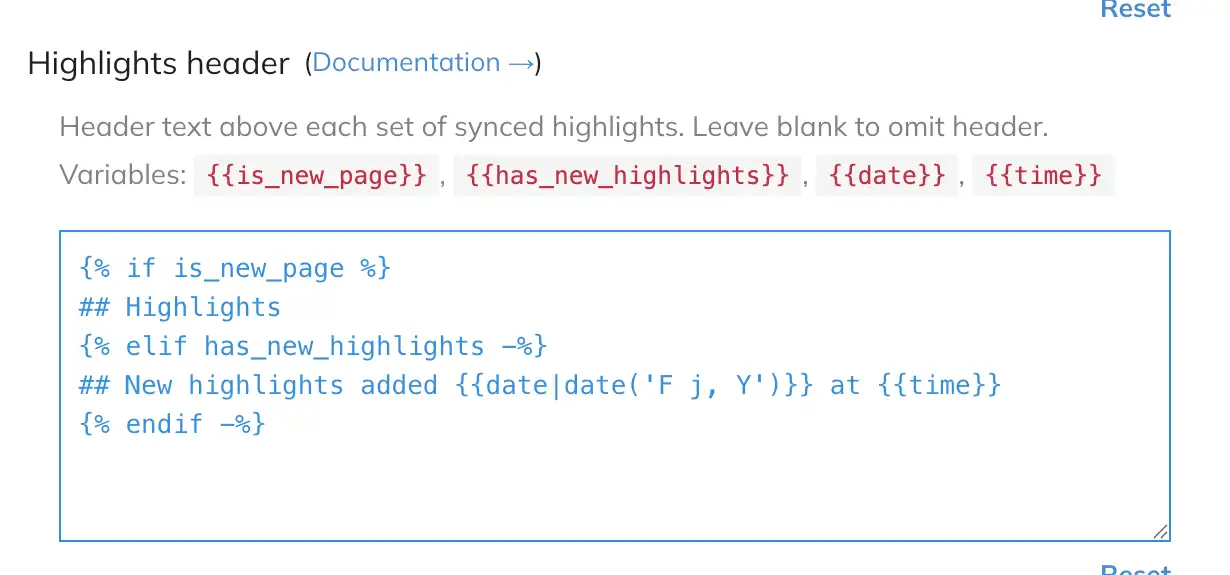
Highlights header controls the heading before the highlights list. The default format shows ## Highlights during the first sync, then shows a timestamped update message when new highlights are added later.
If you do not want to show the new highlight time, you can change this field to one simple line:
## HighlightsIf you do not want ## Highlights either, you can leave this field empty. The note body then goes directly into the highlights list and looks cleaner.
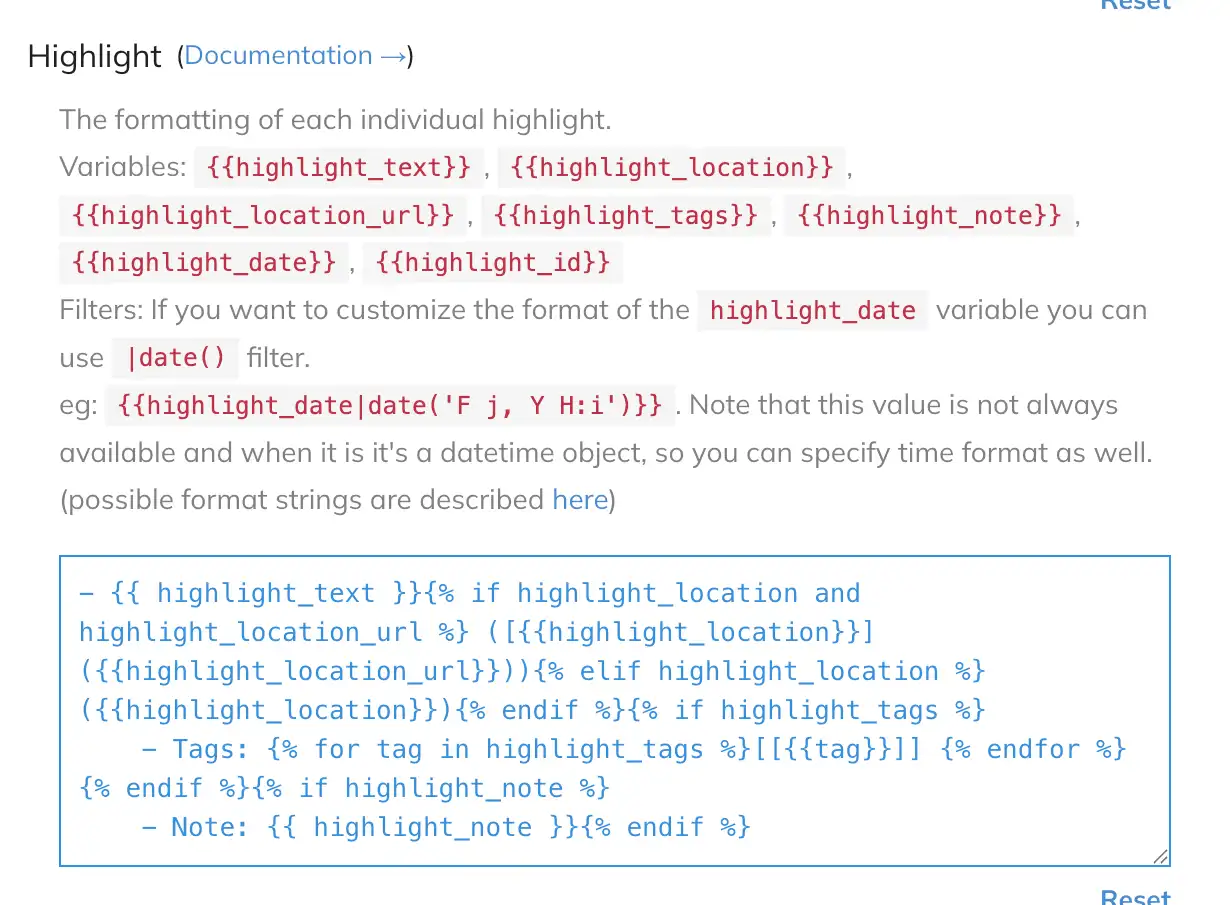
Highlight decides how each highlight is formatted. It can control the highlight text, location link, tags, and personal notes.
This part directly affects the reading experience, so keep the default format at first. Once you start reviewing Readwise highlights regularly, adjust it to match your reading habits.
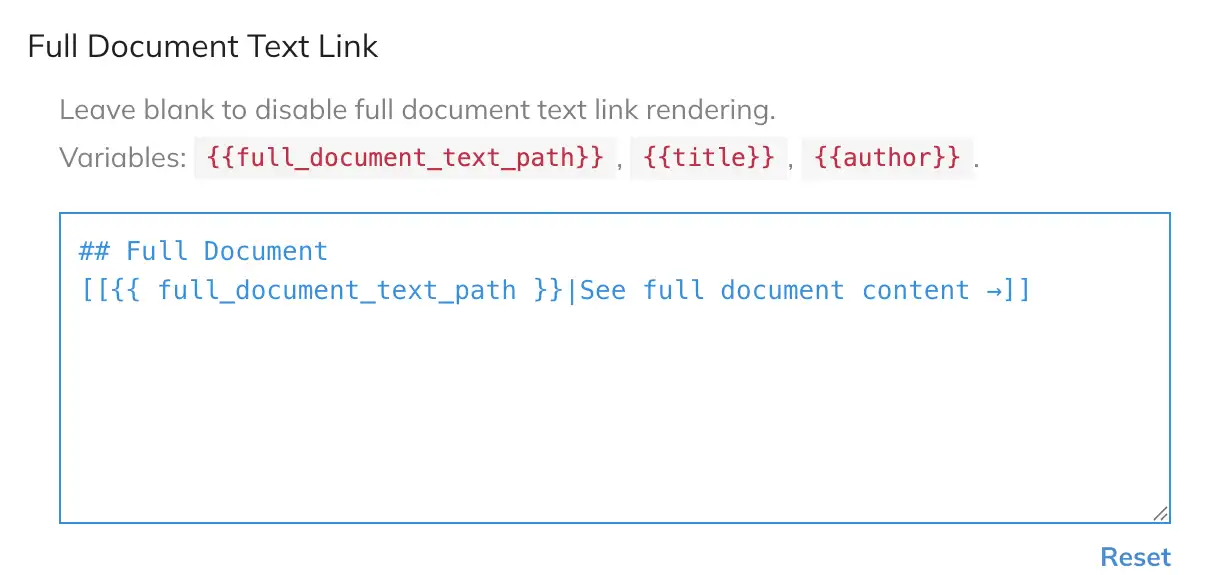
Full Document Text Link generates a link from the highlight note to the full-text file.
If you did not turn on Export All Reader Documents, or if you do not want to place full-text links in highlight notes for now, you can leave this field empty.
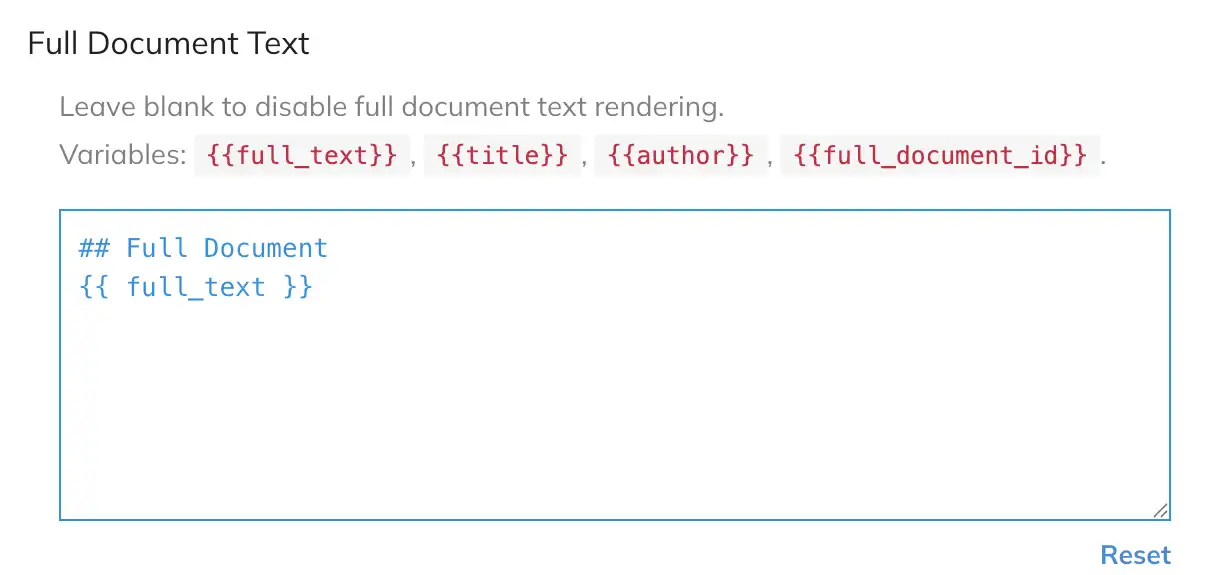
Full Document Text decides how the full document body should be displayed. It only matters when full-text export is turned on.
YAML front matter is the most important field on this page. It controls the property fields written to the top of each Markdown file synced from Readwise.
You do not need to write the two --- lines in this input. Just write the property content itself.
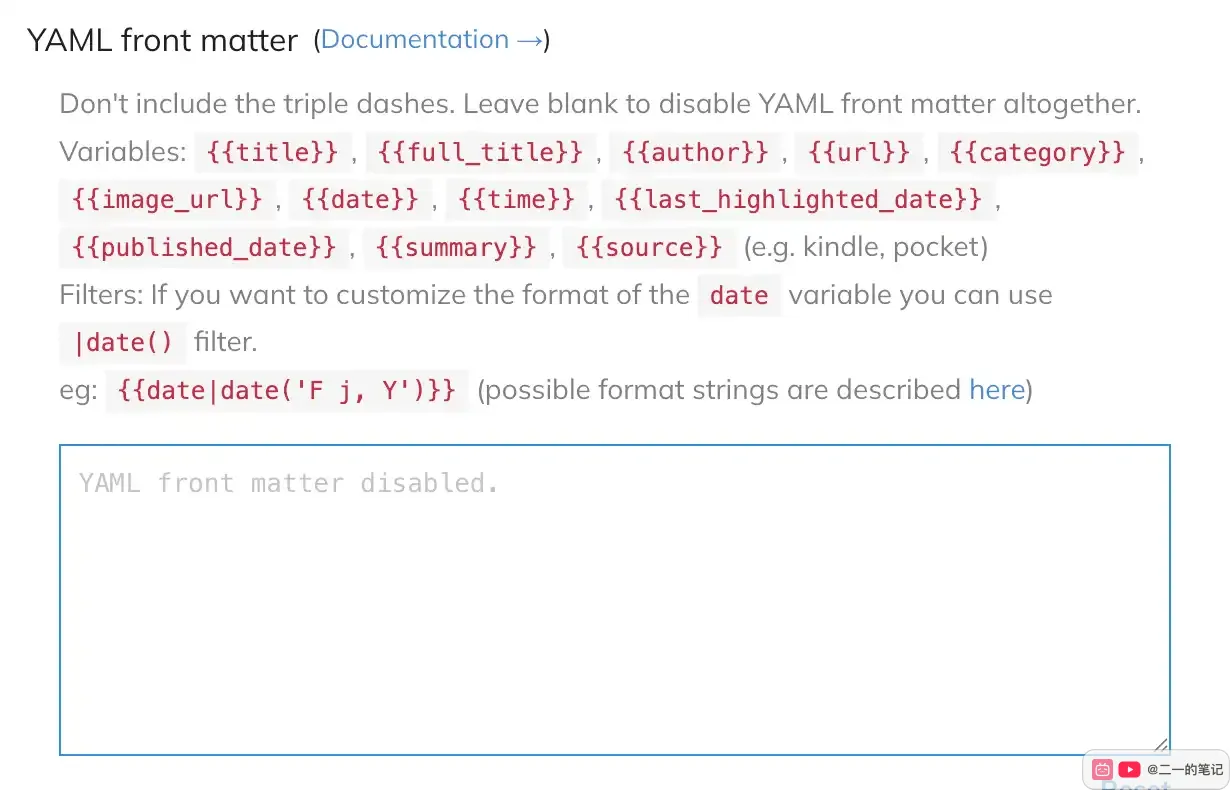
Here is the setup I use.
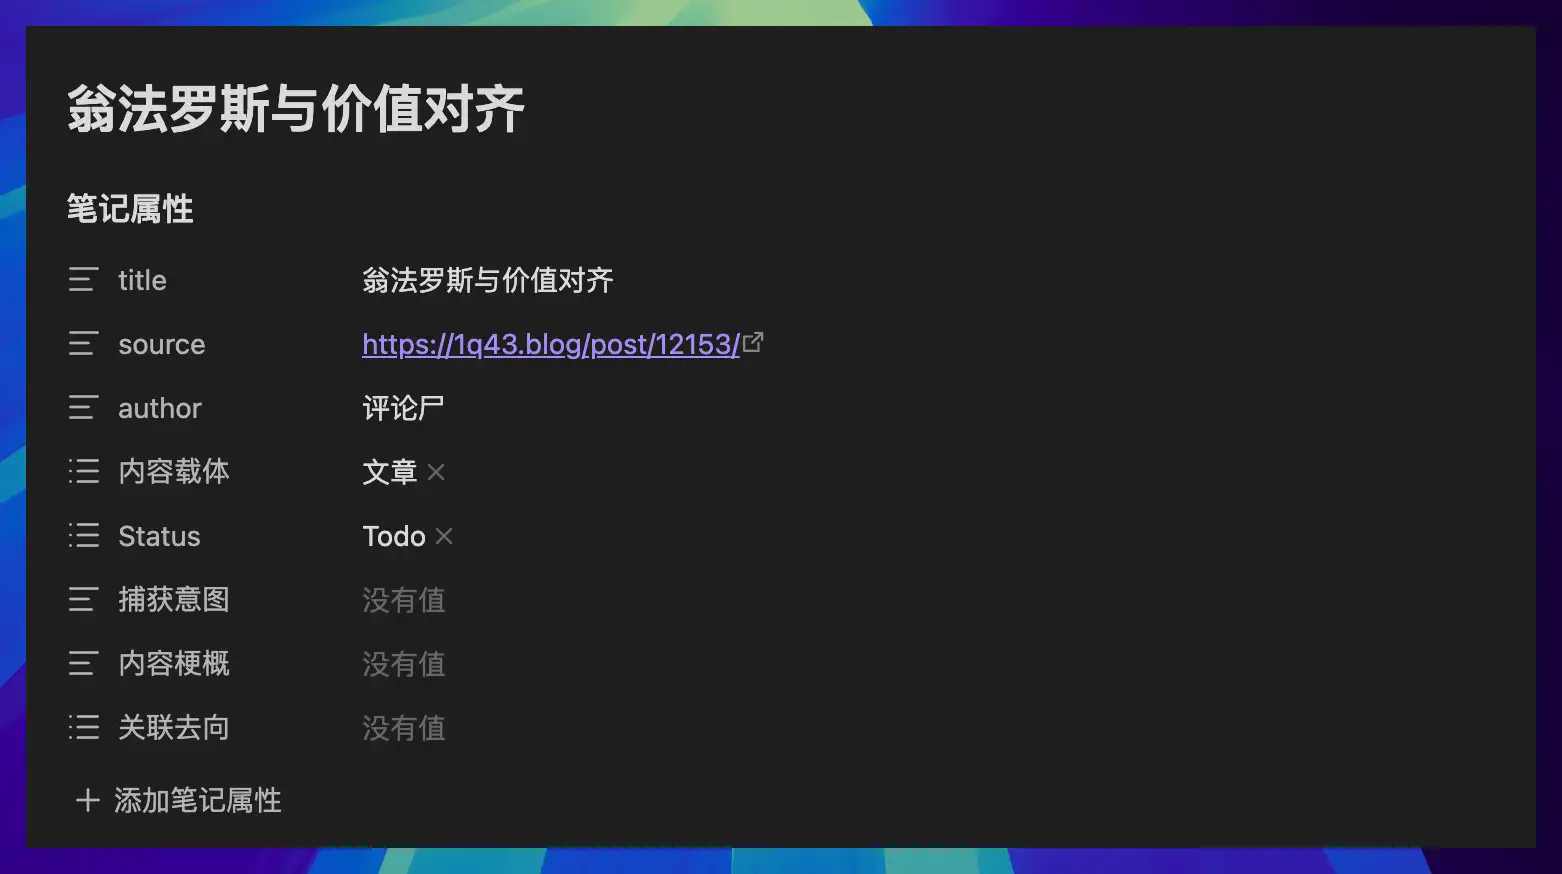
After sync, each file automatically includes title, source, author, and content type. Later, when I open a clipping overview Base, I can filter by article, video, post, book, or podcast without manually filling fields every time.
title: '{% if category == 'tweets' %}{{author|replace("'", "''")|replace('@','')|replace(' on Twitter','')}} - {{book_id}}{% else %}{{ title|replace("'", "''") }}{% endif %}'
source: '{{ url|replace("'", "''") }}'
author: '{{ author|replace("'", "''") }}'
内容载体: {% if source == 'youtube' or (url and ('youtube.com' in url or 'youtu.be' in url)) %}视频{% elif category == 'articles' %}文章{% elif category == 'tweets' %}帖子{% elif category == 'books' %}书籍{% elif category == 'podcasts' %}播客{% else %}文章{% endif %}
Status: Todo
捕获意图:
内容梗概:
关联去向:
This configuration handles a few practical problems:
title: Regular articles keep using the original title. Tweets often do not have stable titles, and using the body text directly would make file names and properties very long, so this changes them to author name plus Readwise ID.sourceandauthor: These are written into the properties area, so you do not need to look for the source in the body later.内容载体: This converts Readwise categories into Chinese fields that better fit my personal Obsidian template, such as articles, posts, books, and podcasts. YouTube links are recognized as videos.Status: Todo: All newly synced materials first enter a pending state. Later, you can decide whether to read, organize, quote, or archive them.捕获意图,内容梗概, and关联去向: These are left empty first, so they can be filled manually later or completed with AI assistance.
The synced result in Obsidian looks like this:
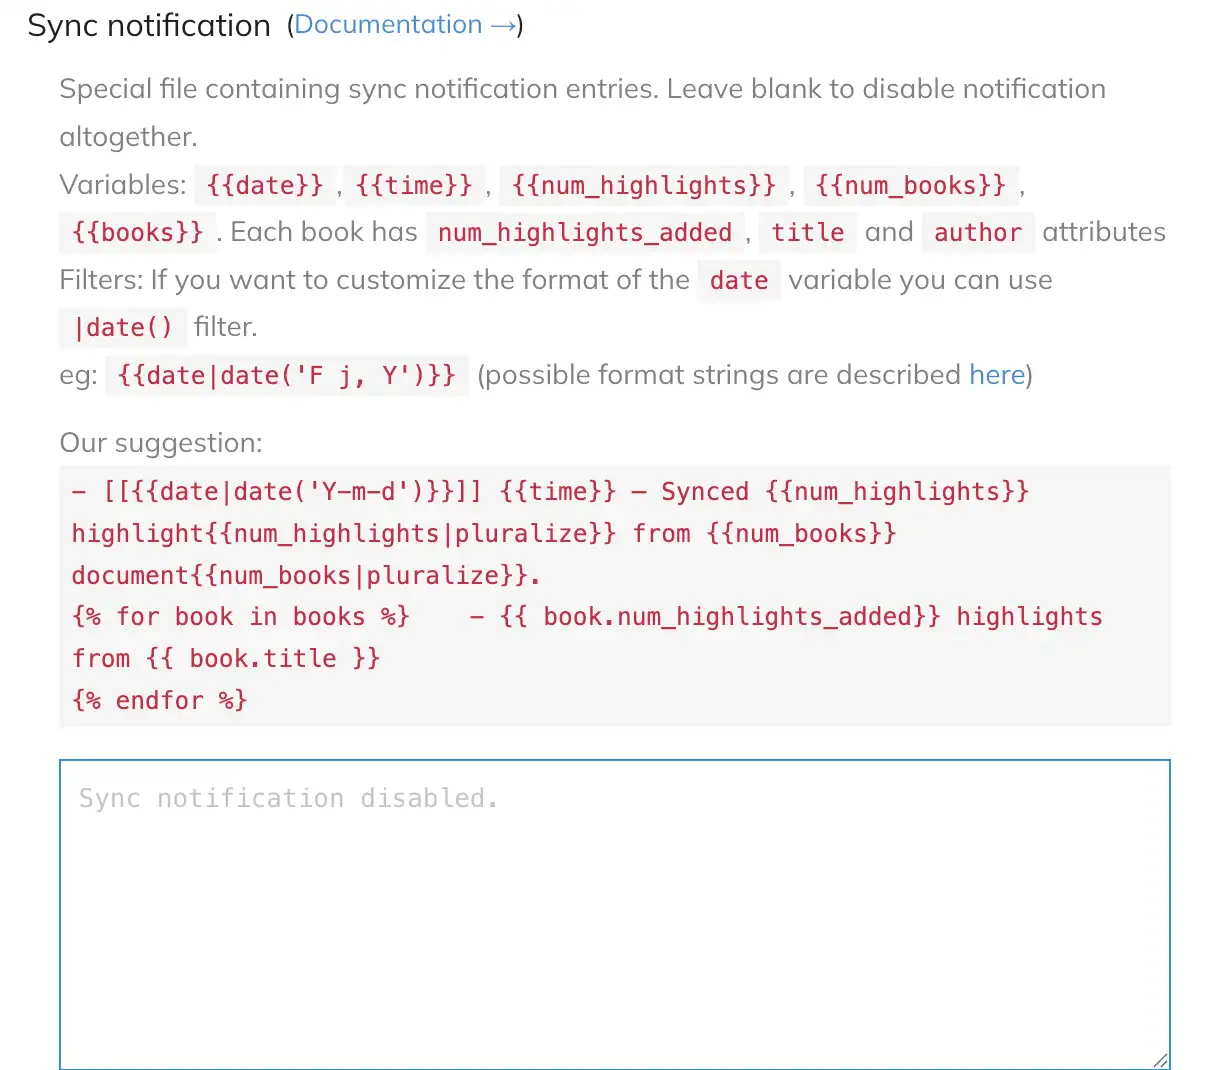
Finally, Sync notification is a sync log. It creates a special file to record how many highlights were synced each time and which documents they came from. You can keep this turned off at first to avoid generating another log file you may not need yet.
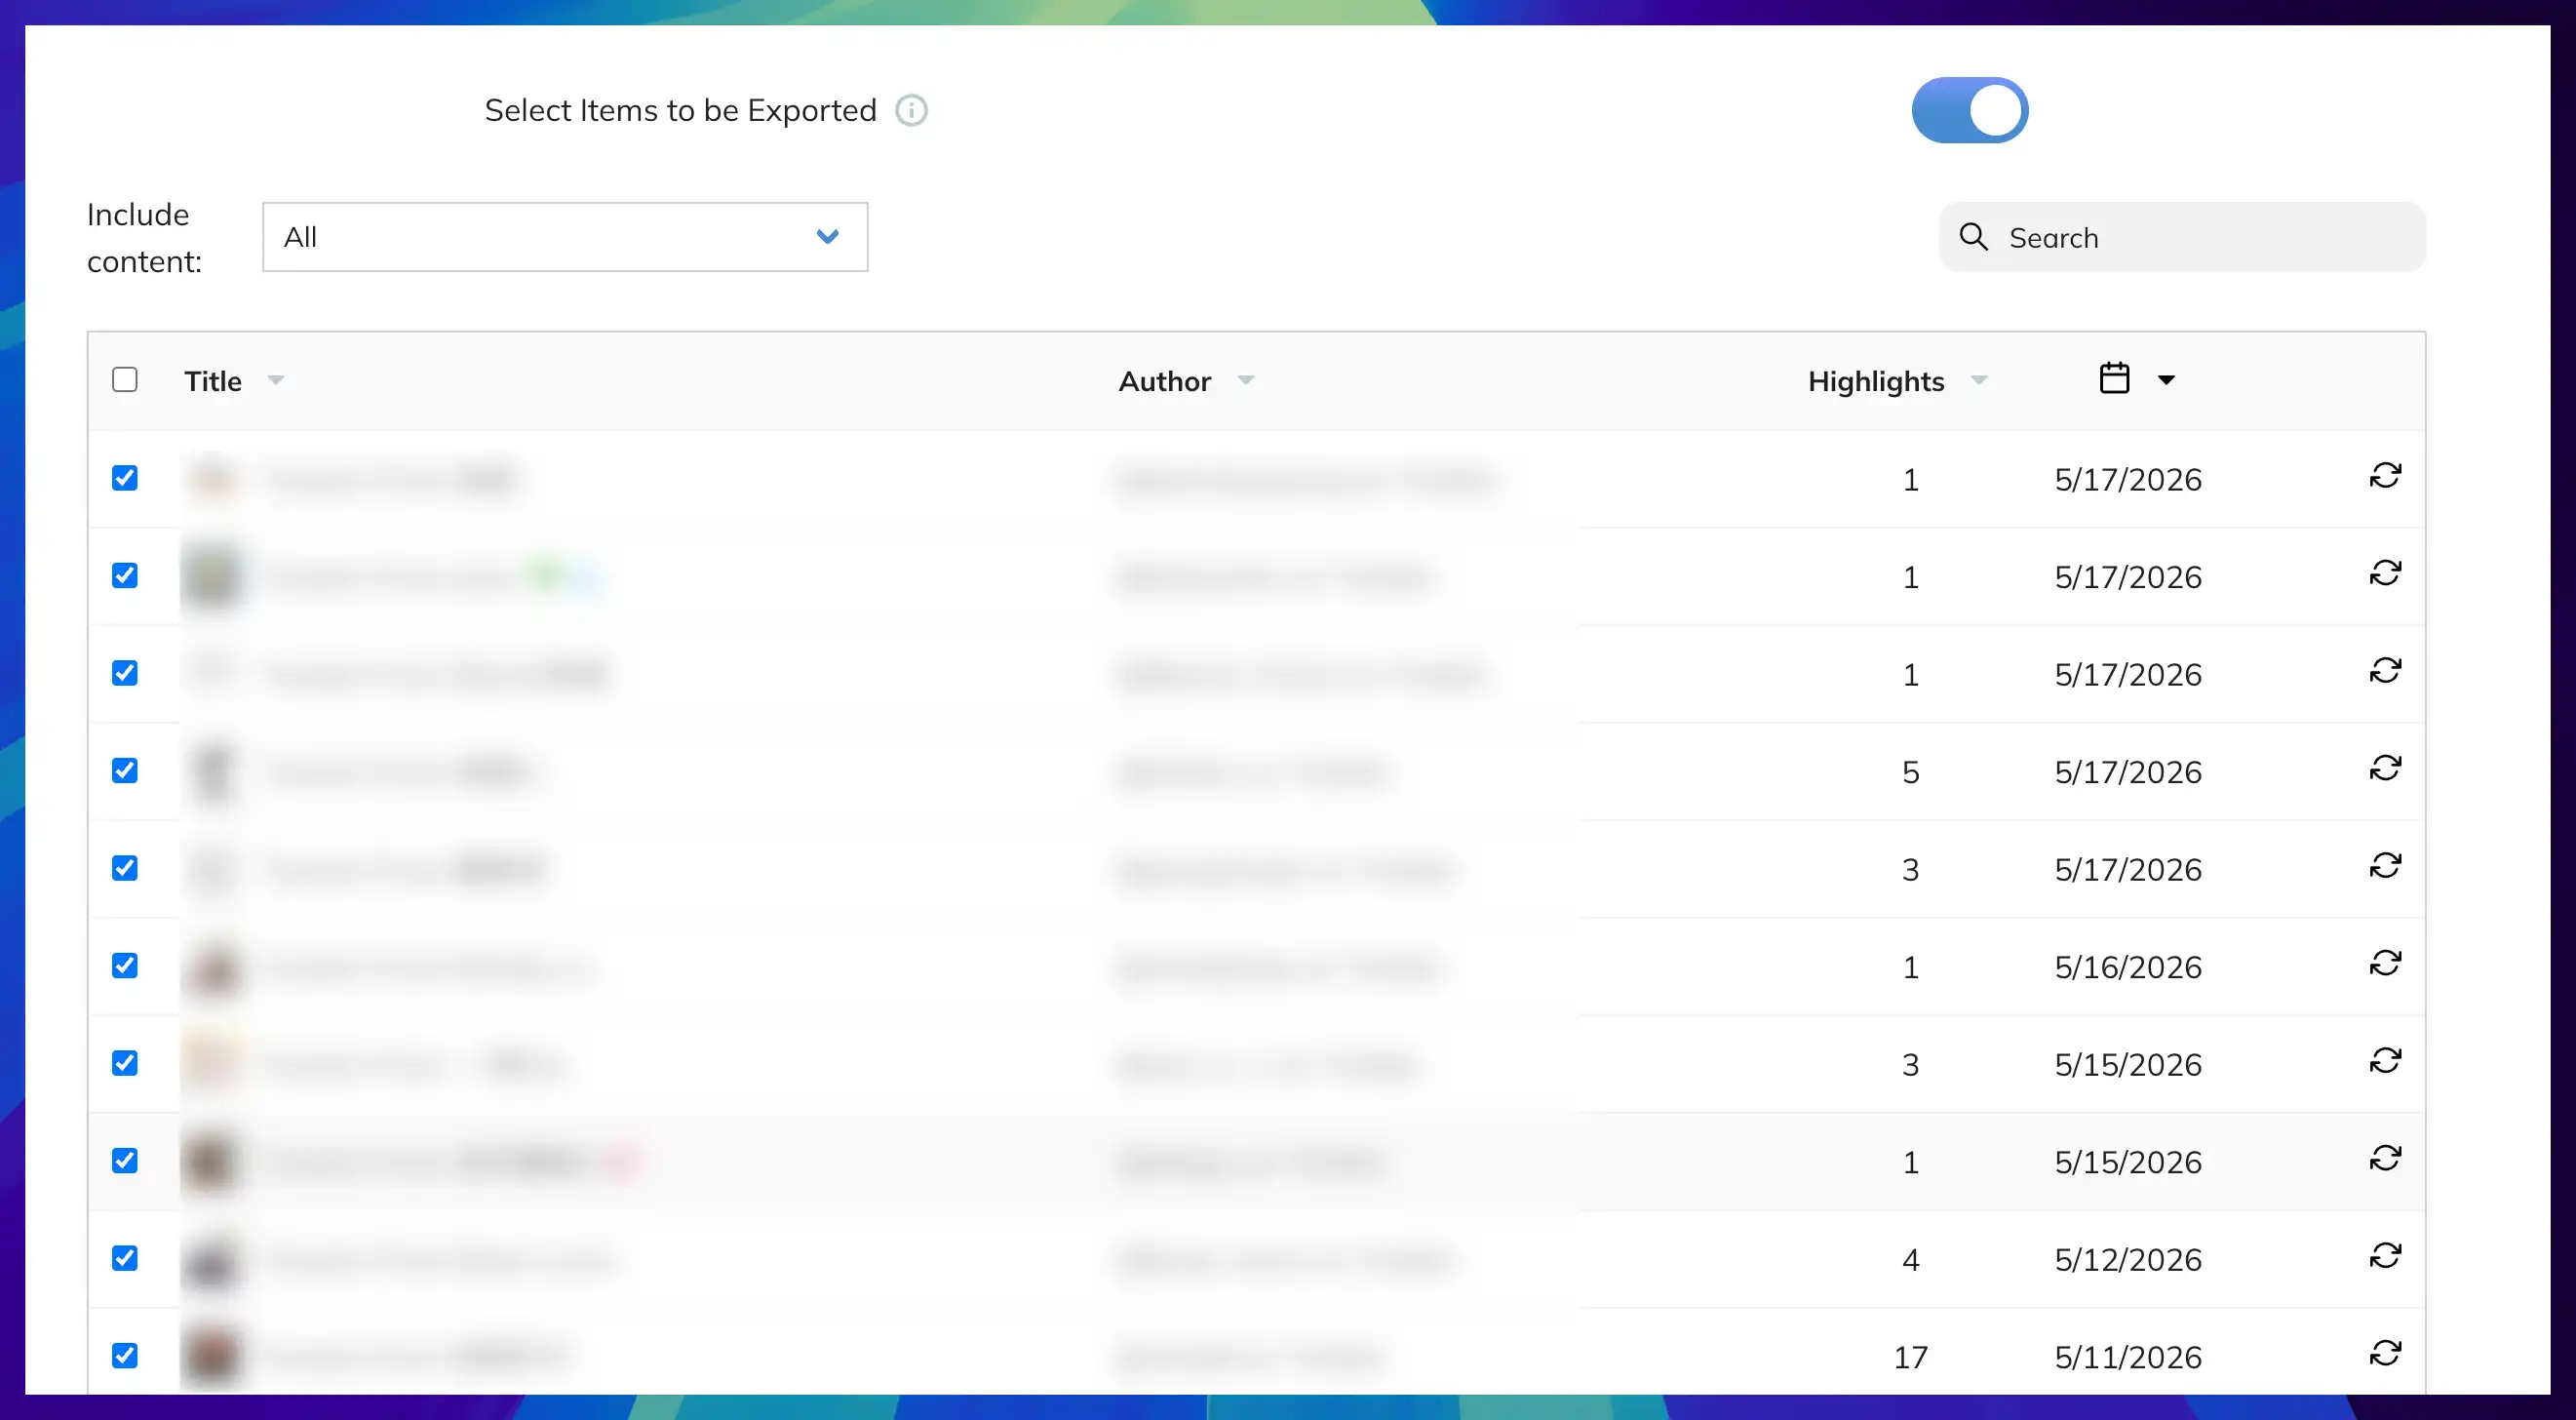
5. Select Items to be Exported
When this switch is turned on, you can choose the sync range from the list, such as syncing everything, only syncing the past week, only syncing the past month, or only syncing the latest 10 or 100 highlights. Each row below can also be checked separately.
Plugin-side settings
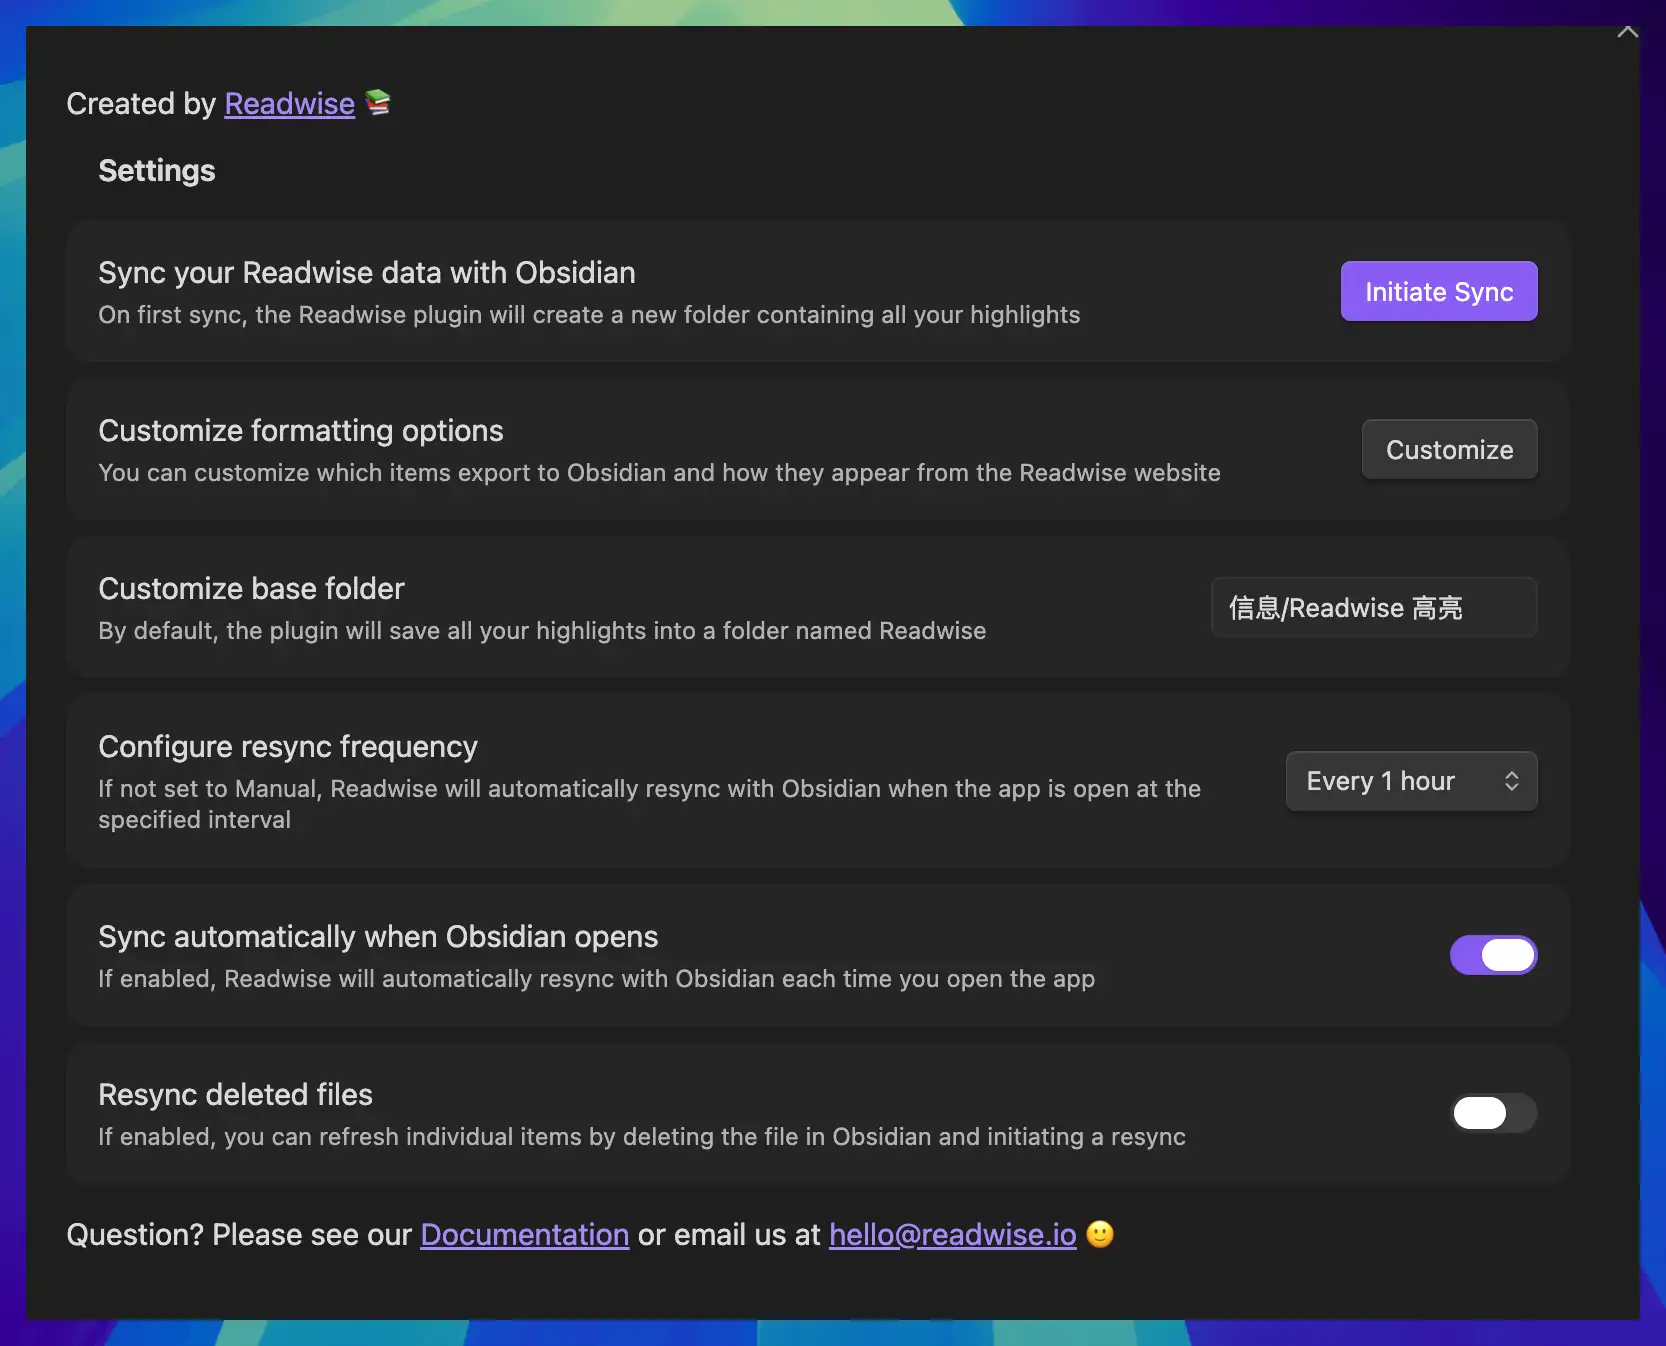
The plugin side mainly handles local sync in Obsidian. Customize base folder decides which folder Readwise content should sync into.
Configure resync frequency and Sync automatically when Obsidian opens control automatic sync frequency. When you are configuring it for the first time, manually click Initiate Sync and test a small batch first. After confirming that the folder, fields, and body format all look right, then decide whether to enable automatic sync.
Resync deleted files can stay turned off at first. Otherwise, after you delete synced files you do not want to keep in Obsidian, they may be pulled back again during the next sync.
Final note
Readwise integration is best for people who already use Readwise or Reader for a long time. For most Obsidian users, getting clipped content into the information library reliably matters more than trying to automate everything at once.
Start by syncing a small amount of content. Check the folder, property fields, and body format. Once they match your organizing habits, expand the sync range. This matters most for X posts and full-text export, because they are the easiest places to create duplicate files.
More Posts
How to choose between Notion and Obsidian: workflows, notes, and AI
Notion and Obsidian differ in how they organize, retrieve, and carry information forward. This article explains the thinking behind both tools.

Obsidian 剪藏文章后自动下载网页图片的方法
用 Obsidian 自带命令下载剪藏图片,或设置 Auto Download Images After Web Clipping 插件自动保存图片到本地附件文件夹,并批量补下旧文章的图片。

Obsidian Git Sync Tutorial: GitHub Backup, Plugin Setup, and Multi-device Pull Workflow
This tutorial shows how to sync an Obsidian vault with GitHub and the Obsidian Git plugin, then pull the same vault on Windows, Android, and iPhone.